How to Make Popular Styles with a 360 Lace Wig?
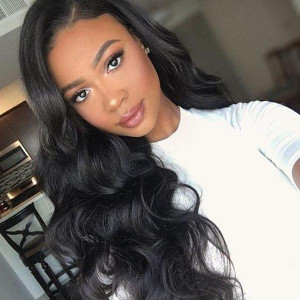
African Americans wear wigs a lot these days because they may give ladies a completely new look, increase self-confidence, and enable them to change their hairdo quickly without harming their natural hair. Many women are choosing the 360 lace wig instead of the more popular lace frontal and lace closure wigs to achieve more intricate designs and a more comfortable wearing experience. You can accomplish a variety of styles that seem natural and versatile with 360 wigs of human hair, ranging from a sleek high ponytail to a messy updo and anything in between. For your reference, this blog provides advice on many styles to embrace.
Let's start with adequately installing a 360 lace wig before learning how to create intricate styles. Don't worry, even if it could appear like a difficult chore for people unfamiliar with this wig type! We'll walk you through the installation procedure step-by-step so you can do it without any trouble and get the perfect finish.
360 Wig Install
Prep your natural hair
It's crucial to first prepare your natural hair for the 360 wig installation. To hold your hair in place, you might wear a flat stocking cap on your head over your braids. By taking this step, you can ensure your wig stays in place and comfy all day.
Attach the stocking cap.
Ensure your hairline and nape are tidy and free of flyaways that could interfere with putting the wig down. When taking off the wig, apply the glue somewhat away from your hairline to make removal easier. Next, you'll attach our stocking cap to this line. Remember that the skin behind the wig lace needs to be completely dry and washed if you want the stocking cap to adhere to the nape and the wig. The lace will only adhere well if it is somewhat moistened, has oil, or has been thoroughly cleaned. As soon as the glue becomes transparent, you can insert the cap into the glue, allowing it to show through the cap partially.
Apply your wig
You can then start the installation procedure. The 360 frontal wig should be placed on your head and adjusted to fit snugly. Sure, there are no spaces between your skin's margins, and the lace where they meet is crucial.
It's time to fasten the wig after you've placed it. Before applying glue, you might use an eyeliner pencil to sketch the entire hairline. You can use two coats of adhesive to securely hold the lace around your head. Once the second application has dried, the wig must fit flawlessly from front to back. Next, attach the lace. Care must be taken before gluing anything down to avoid unintentionally pulling the front too far forward and exposing the cap in the back. To prevent applying glue to visible areas of your scalp, it is advisable to work from the front to the rear. This will assist in maintaining organization and give you a smooth, organic appearance.
Advice: Lower your head before attaching the lace to achieve a beautiful back. This is because if you attach the lace while your head is up, it will be pulled up as soon as you lower it.
Cut and trim the lace
Trick off any extra lace around the edges after applying the adhesive. There shouldn't be any excess material hanging past the edges; they should be even with one another. Adjust the lace at the end if it appears a bit light. This step will make you appear well-groomed and professional.
Style your wig
After a few minutes to let the adhesive dry, style your wig how you like. After brushing the hair to prevent it from clinging to the adhesive, please squeeze it until it is firmly in place. You have three options: curl, straighten, or leave it untouched. You have a lot of styling possibilities with the 360 lace wig, so go ahead and try different looks until you find one that works for you.
Apply hairspray to shape your hair.
Using hairspray to seal the deal will ensure your wig stays in place and looks flawless all day. This will increase your daily confidence and assist in preventing movement or slipping.
Congratulations! You've made it this far! You'll soon be looking great with your new wig. When it comes to 360 wig styles, a high ponytail is usually the first thing that springs to mind. One of the main reasons why people adore them is their style, which is also the most typical and popular for them.
How to put up a high ponytail
Step 1: Make your hair into a ponytail using a wide-tooth comb. Next, smooth out the hair with the wide-tooth comb and shape it into the desired ponytail.
Step 2: Choose your position. You can wear your ponytail low in the middle if you want to wear it low. You have the last say on it. The mousse will assist in shaping and molding the hair and guarantee that everything is laid smoothly in damp conditions. Add it after that.
Step 3: Apply pressure with a hot comb to move it in the desired direction. Instead of a full lace wig, this is a 360 frontal wig, so you could find it challenging to get the hair to go up without it seeming lumpy. It would help if you also went for a more relaxed style that resembles a sloppy ponytail because it won't get immaculate. To make it looser and more natural, take a comb and tease back a little.
Final Words
Maybe you used to be so afraid of frontal ponytails that you wanted to stay away from them altogether. With a bit of perseverance and practice, it is doable. A 360 wig can be used to create various adorable and entertaining looks. For instance, you can even wear your ponytail in a low or high bun. This hairstyle is ideal for preventing sweat when working out at the gym. You can even slay your sideburns and edges for a more daring style if you're a bold gal.
closure sew ins%20(1)-1841x1841.jpg)

